これはなに

Next.js 15でWebアプリを作る環境構築をしたときの手順メモ。
環境

WSL2 : Ubuntu-24.04
Docker version 28.4.0
VS Code 1.105.0 x64
Next.js 15.5.4
TypeScript 5.9.3
Prettier 3.6.2
VS Codeの改行設定を変更する

VSCodeの改行の設定を、念のためLFにする。
{
  "files.eol": "\n"
}
Dev Containersを用いたVS Code用開発環境を構築する

VS Codeの拡張機能Dev Containersを使って環境を構築する。
.devcontainerディレクトリを作成し、その中にdevcontainer.jsonとDockerfile、compose.yamlを作成する。
.
└── .devcontainer/
    ├── compose.yaml
    ├── devcontainer.json
    └── Dockerfile
compose.yamlを作成する

compose.yamlは次のように記述する。
services:
  app:
    build:
      context: ..
      dockerfile: .devcontainer/Dockerfile
    container_name: your-project-name
    command: sleep infinity
    logging:
      driver: json-file
      options:
        max-size: "1m"
        max-file: "3"
    volumes:
      - ../..:/workspaces:cached
      - ~/.gnupg:/home/node/.gnupg
    ports:
      - "3050:3000"
    environment:
      - GPG_TTY=/dev/pts/0
      - TZ=Asia/Tokyo
      - LANG=ja_JP.UTF-8
      - LANGUAGE=ja_JP:jp
- LC_ALL=ja_JP.UTF-8your-project-nameは任意のコンテナ名に変更する。3050:3000の3050はホスト側のポート番号で、3000はコンテナ側のポート番号である。3050のほうは任意のポート番号に変更できるが、3000はNext.jsのデフォルトポートなので変更しない。TZはタイムゾーン、LANG、LANGUAGE、LC_ALLはロケール設定である。必要に応じて変更する。
devcontainer.jsonを作成する

devcontainer.jsonは次のように記述する。
{
  "name": "your-project-name",
  "dockerComposeFile": "./compose.yaml",
  "service": "app",
  "workspaceFolder": "/workspaces/${localWorkspaceFolderBasename}",
  "customizations": {
    "vscode": {
      "extensions": [
        "dbaeumer.vscode-eslint",
        "esbenp.prettier-vscode",
        "bradlc.vscode-tailwindcss",
        "formulahendry.auto-rename-tag",
        "christian-kohler.path-intellisense"
      ],
      "settings": {
        "editor.defaultFormatter": "esbenp.prettier-vscode",
        "editor.formatOnSave": true
      }
    }
  },
  "remoteUser": "node"
}your-project-nameは任意の名前に変更する。extensionsは必須の拡張機能を指定する。必要に応じて変更する。ちなみに、必須でない拡張機能は.vscode/extensions.jsonに記述するとよい。
Dockerfileを作成する

Dockerfileは次のように記述する。
FROM node:22-bookworm

# Install additional tools and dependencies
RUN apt-get update -y \
    && DEBIAN_FRONTEND=noninteractive \
    apt-get install -y --no-install-recommends \
    ca-certificates \
    curl \
    git \
    gnupg \
    locales \
    openssh-client \
    tzdata \
    xsel \
    && update-ca-certificates \
    && apt-get clean \
    && rm -rf /var/lib/apt/lists/*

# Set up available locales (can be controlled via compose.yaml)
RUN locale-gen en_US.UTF-8 ja_JP.UTF-8 \
    && localedef -f UTF-8 -i en_US en_US.UTF-8 \
    && localedef -f UTF-8 -i ja_JP ja_JP.UTF-8

# Install global npm packages
RUN npm install -g @anthropic-ai/claude-code

# Set working directory
WORKDIR /workspaces

# Expose Next.js default port
EXPOSE 3000

# Switch to non-root user
USER node

# Set default command
CMD ["bash"]node:22-bookwormはNode.js 22のDockerイメージである。必要に応じて変更する。claude-codeは必要に応じて削除する。
Dockerコンテナにアタッチする

VSCodeの拡張機能Dev Containersを使って、Dockerfileをビルドし、Dockerコンテナにアタッチする。
VS CodeでCtrl + Shift + Pを押してコマンドパレットを開き、Dev Containers: Reopen in Containerを実行する。これにより、Dockerfileがビルドされ、VS Codeがコンテナにアタッチされる。
推奨拡張機能をインストールする

VS Codeの拡張機能のタブで@recommendedと検索すると、.vscode/extensions.jsonに記述した拡張機能が表示される。必要に応じて拡張機能をインストールする。
Git管理する

プロジェクトをgit管理下に置く。
git initbranch名をデフォルトでmainにしていない場合はwarningが出るので、mainにしておく。
git branch -m mainアプリを作成する

コンテナ内でアプリ作成コマンドをたたく。
npx create-next-app@latestcreate-next-appをインストールするか聞かれたらyを入力してインストールする。
いろいろ聞かれるので、適宜プロジェクトに合わせて答える。
出力結果の例を示す。

出力の詳細
$ npx create-next-app@latest
Need to install the following packages:
create-next-app@15.5.4
Ok to proceed? (y) y

✔ What is your project named? … next-app
✔ Would you like to use TypeScript? … No / Yes
✔ Which linter would you like to use? › ESLint
✔ Would you like to use Tailwind CSS? … No / Yes
✔ Would you like your code inside a `src/` directory? … No / Yes
✔ Would you like to use App Router? (recommended) … No / Yes
✔ Would you like to use Turbopack? (recommended) … No / Yes
✔ Would you like to customize the import alias (`@/*` by default)? … No / Yes
Creating a new Next.js app in /workspaces/your-project-name/next-app.

Using npm.

Initializing project with template: app-tw


Installing dependencies:
- react
- react-dom
- next

Installing devDependencies:
- typescript
- @types/node
- @types/react
- @types/react-dom
- @tailwindcss/postcss
- tailwindcss
- eslint
- eslint-config-next
- @eslint/eslintrc


added 332 packages, and audited 333 packages in 20s

136 packages are looking for funding
  run `npm fund` for details

found 0 vulnerabilities
Success! Created next-app at /workspaces/your-project-name/next-app
アプリを起動する

作成されたアプリディレクトリへ移動し、アプリを起動する。
cd next-app
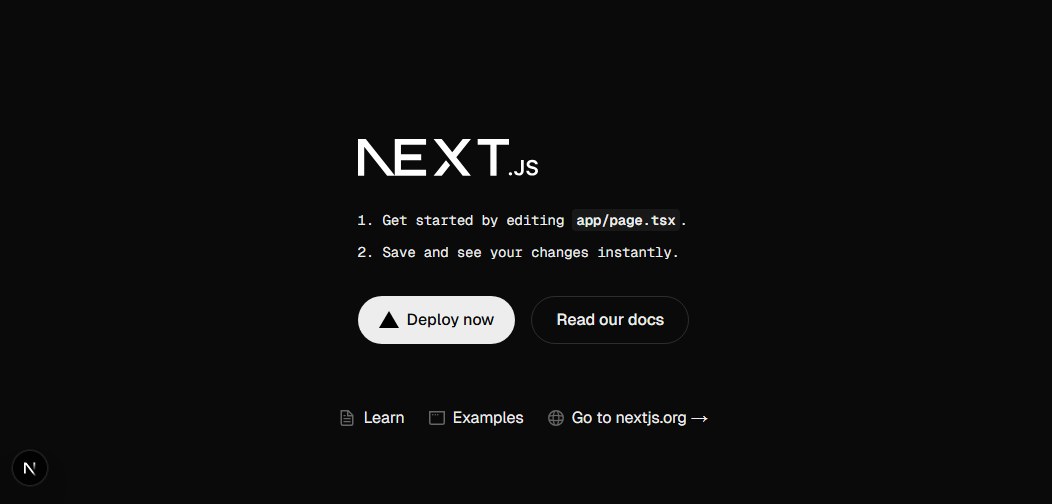
npm run devhttp://localhost:3050/にアクセスすると、Next.jsのデフォルトページが表示される。

ESLintのルールを変更する

必要に応じて、ESLintのルールを変更する。
変更したら、ESLintを実行して動作を確認する。
npm run lintPrettierを入れる

FormatterとしてPrettierを入れる。
パッケージをインストールする。
npm install --save-dev prettier eslint-config-prettierPrettierの設定ファイル.prettierrc.yamlを作る。
{
  'semi': true,
  'trailingComma': 'all',
  'singleQuote': true,
  'printWidth': 80,
  'tabWidth': 2,
}eslint.config.mjsにPrettierの設定を追加する。必ず最後に追加する。
// ...

const eslintConfig = [
  // ...
- ...compat.extends('next/core-web-vitals', 'next/typescript'),
+ ...compat.extends('next/core-web-vitals', 'next/typescript', 'prettier'),
  // ...
];
export default eslintConfig;
package.jsonにformatコマンドを追加する。
  "scripts": {
    "dev": "next dev",
    "build": "next build",
    "start": "next start",
    "lint": "next lint --ignore-path .gitignore",
+   "format": "prettier --write --ignore-path .gitignore ."
  },
Prettierを実行して動作を確認する。
npm run formatコミット時にlinterとformatterを自動実行する

コミット時にnpm run lintとnpm run formatを実行し、エラーが出る場合はコミットできないようにする。
まず、huskyをインストールする。
npm install --save-dev husky次に、husky-initコマンドを実行する。
npx husky init成功すると、.huskyディレクトリが生成され、自動でpre-commitフックが追加される。
$ cat .husky/pre-commit
npm testこれを、npx lint-stagedを実行するように変更する。
$ cat .husky/pre-commit
npx lint-staged
特殊な環境でのhuskyのpre-commitフックの変更について
.gitディレクトリとpackage.jsonファイルが同じ階層に存在しない場合、下記のように、階層を移動するコマンドを追加する必要がある。
+ cd next-app  # package.jsonのある階層に移動する

npx lint-staged
ここまでで、huskyの設定は完了である。
次に、lint-stagedをインストールする。
lint-stagedはNext.jsのアプリプロジェクト内へインストールすること。npm install --save-dev lint-stagedpackage.jsonにlint-stagedの設定を追加する。
  "scripts": {
    "dev": "next dev --turbopack",
    "build": "next build --turbopack",
    "start": "next start",
    "lint": "eslint",
    "format": "prettier --write --ignore-path .gitignore ."
  },
+ "lint-staged": {
+   "*.{js,jsx,ts,tsx,json,css,md}": [
+     "npm run format",
+     "npm run lint"
+   ]
+ },
以上までの設定で、コミット時にlinterとformatterが自動で実行され、通らない場合はコミットできなくなる。
コミットメッセージを自動チェックして統一する

コミットメッセージのフォーマットを統一するため、commitlintを入れる。
まず、commitlintを入れる。
npm install -D @commitlint/cli @commitlint/config-conventional次に、下記のコマンドを実行してcommitlint.config.jsを作成する。
echo "export default { extends: ['@commitlint/config-conventional'] };" > commitlint.config.js作成されたcommitlint.config.jsは以下のようになる。
export default { extends: ["@commitlint/config-conventional"] };以上でcommitlintが動作するようになった。実行されるか確認する。
npx commitlint --from HEAD~1 --to HEAD --verbose実行されれば、下記のようなログが出力される。
$ npx commitlint --from HEAD~1 --to HEAD --verbose
⧗   input: build(git): set up husky and lint-staged pre-commit
✔ found 0 problems, 0 warnings続いて、コミット時にcommitlintを自動実行するように設定する。下記のコマンドを実行して、huskyにcommitlintを自動実行するcommit-msgフックを追加する。
echo "npx --no -- commitlint --edit \${1}" > .husky/commit-msgこれにより、.husky/commit-msgファイルが作成される。
npx --no -- commitlint --edit ${1}これで、コミット時にcommitlintが実行されるようになる。
最後に、commitlintのルールを変更する。commitlintのルールは、commitlint.config.jsにルールを追記することで変更できる。
たとえば、subject-max-lengthを50に変更する場合は、下記のようにルールを追記する。
module.exports = {
  extends: ['@commitlint/config-conventional'],

+ rules: {
+   'subject-max-length': [2, 'always', 50],
+ },
};
ルールは、{ルール名}: [{レベル:0|1|2}, '{可否:always|never}', {値}]の形式で記述する。レベルは各数値が下記段階に該当する。
- 0: 無効
- 1: 警告
- 2: エラー
オレオレルールを下記に示す。
module.exports = {
  extends: ['@commitlint/config-conventional'],

  rules: {
    'type-case': [2, 'always', 'lower-case'],
    'scope-case': [2, 'always', 'lower-case'],
    'subject-max-length': [2, 'always', 50],
    'body-full-stop': [2, 'always', '.'],
    'body-leading-blank': [2, 'always'],
    'body-max-line-length': [2, 'always', 72],
    'body-case': [2, 'always', 'sentence-case'],
    'footer-leading-blank': [2, 'always'],
    'footer-max-line-length': [2, 'always', 72],
  },
};
参考文献・URL

参考文献・URLは適宜記事内に示した。


